

A lot of people don’t understand how it’s done properly but they don’t want to pay professional mechanics to do the job either. Valvoline Oil change prices and Express Oil change costs aren’t exactly too expensive but if you can do it on your own then why not give it a try?
Changing motor oil has earned a love-hate relationship with car owners. Some people understand the basics while many others haven’t a single clue where to start. It’s not like there’s a big red arrow pointing to where oil is kept and drained.
Luckily, the process isn’t exactly pretty difficult. All one has to figure out is where the oil sump is located, what tools are needed to pull the plug and drain the oil, and then how replace it with new oil. Here’s a basic step by step that just about anyone can follow, starting with a list of important tools needed:
Tools for the Trade
- Box-end wrench
- Filter wrench
- Car jack
- Rubber mallet
- Drip pan
- Oil filter
- Oil filter gasket
- Engine oil
All of these tools are easy to find at any hardware store. You won’t really need to change your oil filter and oil filter gasket every time you change motor oil but it is much safer if you do.
As for your choice of engine oil, there are a lot of great brands to try. If you don’t feel like changing your own oil, you can always go to places such as Valvoline Oil, Express Oil, Jiffy Lube, and Firestone Oil to have them change it for you.
Step One: Getting the Car and Tools in Place
Always make it a point to read your vehicle’s manual about the proper placement of a car jack. Improper placement could damage the vehicle and it could possibly crash back down while you are under the vehicle.
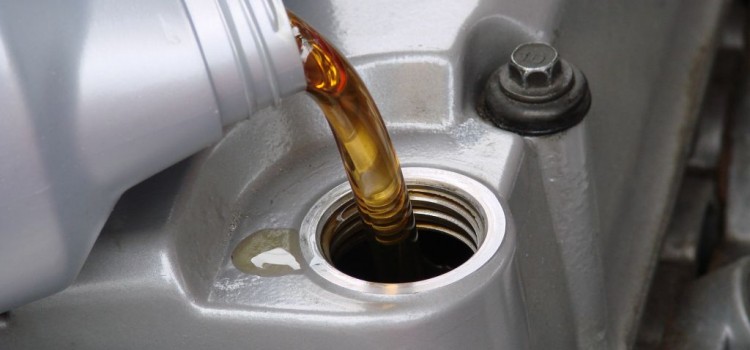
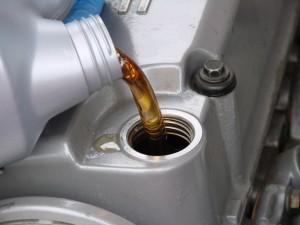
Once the car has been lifted high enough for you to side under, lock the car jack in place. Place plywood stops if you are doing this on asphalt ground. Pop the car hood up and remove the oil filler cap. This is where you’ll be pouring the new oil in. Keep it open to let air help the old oil drain out.
Place the drip pan directly under the oil pan. Not sure which is the oil pan and which is the transmission container? Heat your car a bit and try holding the large, bolted plug. The oil pan will have a hot plug while the transmission container won’t.
Step Two: Draining the Oil
Use the box-end wrench to loosen up the oil filter plug. Don’t complete remove it though or else it’ll fall into your drip pan as the old oil pours out. Just get it loose enough so you can unscrew it by hand.
Pull the plug and let the old oil pour into the drip pan. Normally this takes a good 2-3 minutes. Keep this going until it slows down to a drop per 5 seconds or so. When done, plug the oil pan again.
Do not throw the old oil down the sewers or into a trash can. It’s illegal in most states so just keep the old oil in a bottle. You can properly dispose of this at any mechanics shop and gas station for free or at least for a dollar or so.
Step Three: Replacing Filter and Gasket
Now that the old oil is out, you’ll to take the oil filter out and replace it with the new one. Every car places their oil filter in a different place so you’re only clue is to look for it close to the engine or close to the oil pan.
You might need a filter wrench to take it off, especially if it has been locked in tightly. Once it’s out, you’ll need to add the new filter and its accompanying gasket/washer.
Before you add in the gasket, dip your fingers into the new motor oil and rub it along the gasket’s lines. Install it as you install the new filter.
Some vehicles have a specific number of turns to lock in their oil filters. When in doubt, turn to your manual. Otherwise, just keep turning until the oil filter is neatly locked in place. Use your filter wrench if needed.
Step Four: Adding the New Motor Oil
To check, use the dipstick. However, you’ll want to take measurement when the oil has settled and cooled and the car is on a flat surface. This will ensure you’re getting a more accurate reading. If it’s not enough, open the filler cap and add more oil.
Lock the oil filler cap back in and run the car for a few minutes. Check if there are any leaks. If there are then shut the car off and tighten any bolt or lock where the leak is coming from. When there are no further leaks, your job is done.
No comments so far.
Be first to leave comment below.